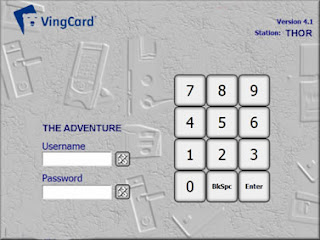
1. Run VingCard Vision 4.1.

2. Check the contents of DataBase Early (before the addition), Ensure That the Database Right There Is No Such Addition
3. Database Backup Early, With Selecting "Backup" Menu / Button
4. Click the "System Setup" Menu / Button
5. Click the "Locks" Menu / Button
6. Select the "Lock Groups" + Next : option
7. Select the "Change an Existing Lock Group" option and then Menu "GUEST ROOM" in the Drop Down then Next
8. Select the "Guest door locks"
9. Select the "Vingcard" option then Next
10. Do not Tick "Whatever" then Next.
11. Select the "Normal" option then Next
12. Fill Range: 801 to 820 + Build
13. No. 801 s / d 820 + has been done select all the new number and then press the "<" button.
14. Rooms Number: 801 to 820 have been moved to the left of the and then press Next button.
15. Select back number: 801 to 820 Press the "<" and then press Next button..
16. Room No. 801 s / d 820 Has Left and then Move To The Next.
17. Note the Next Page, Looks No. 801 s / d 820 has been Added and then Press the Finish button.
18. Note the Next Page, Looks No. 801 s / d 820 has been Added
19. Click the Menu / Button "Keycard Types".
20. Select the option "Change Existing keycard Type" Dropdown Menu and Select "GUEST ROOMS" + Next.
21. Select the "Rooms" option and then press Next button..
22. Select the "Issue Time" option and then press Next button..
23. Select All Room No. 801 s / d 820 + Press "<" button and then press Next button..
24. Room No. 801 s / d 820 Being Has Left The and then Next Page.
25. Do not Pick Anything and then press Next button..
26. Press the Finish button.
27. Press the Yes button.
28. Return to Main Menu Page.
29. Perform Restore Database (Select the Start Menu Restorer :: VingCard + + + Vision Restorer)
Important: Ensure Application "VingCard Vision" in a state of active and "Vision ASA Server" Also in a state of active.
30. Press the "Users".
31. Press the "Shutdown" button.
32. Press the "Yes".
33. Turn Back Applicability VingCard Vision.
34. Click Menu "Guest keycards" Note that Room No. 801 s / d 820 Has Some On VingCard Vision.
35. Finish


1 comment:
Thank you for this information.
I've never found like this tutorial VingCard before.
This Tutorial more be very easier to understand.
Thank you.
Romsey
Post a Comment